
Popular sword cutting targets
If you’re interested in or actively practicing HEMA, you’ll likely come across sword cutting sooner or later. While it may seem like a specialty, additional activity in a sport focused on tournament sword fighting, we consider cutting to be an essential aspect of HEMA training.
Whether you’re training for a HEMA cutting competition or simply having fun cutting stuff with swords, cutting is one of the best ways to assess the quality of your strikes. In modern HEMA tournaments, tapping someone with your sword might get you a point. But we’re seeking to emulate real, historical sword fights, where each hit must display power and accuracy to defend yourself and win the fight. Cutting clearly shows you whether you’re achieving this goal.
At SoCal Swords, we teach students to practice solid cutting form with each swing of their sword. (These lessons aren’t limited to our students; we also offer in-person cutting seminars and virtual cutting assessments to improve your cutting technique.)  Cutting tangible objects lets you clearly assess your skill and identify areas that need improvement. Students then apply those lessons not only to their cutting, but to their drilling and sparring as well.
Popular things to cut with a sword
If you’re ready to start cutting, you may be wondering: What can I cut with my sword? Some items, like water bottles, have been cut by nearly anyone who’s ever held a sharp sword. Others are seasonal, like pumpkins, while others may be one-time items that happen to be available, like prop skulls from a film set.  While tatami is a well-known cutting material, it has recently become nearly impossible to find cheap tatami mats, so we’ve included several tatami mat cutting alternatives.
Sword cutting targets vary in everything from cost and availability to difficulty and environmental impact. Below, we detail the pros and cons of several of the most popular cutting materials: water bottles, tatami, paper, and clay.
|
Cost |
Availability |
Difficulty (ranked) |
Speed needed (ranked) |
Reusable/ recyclable |
Preparation |
Mess |
Sharp or blunt blade |
|
|
Water bottles |
Cheap |
Very available |
1 (easiest) |
2 |
Possibly recyclable, wastes water |
Minimal |
Relatively low; clean up plastic pieces and oil/wipe sword |
Sharp |
|
Tatami |
Expensive |
Difficult to find |
4 (most difficult) |
4 (fastest) |
Composted in green waste |
Need a cutting stand, wooden spikes, and rolled/soaked tatami |
Medium; clean up tatami pieces and oil/wipe sword |
Sharp |
|
Paper |
Medium |
Relatively available (need thick paper) |
2 |
1 (slowest) |
Recyclable or reusable (we reuse for packing material) |
Need a stand or hanging apparatus |
Low; clean up paper pieces, no sword cleaning needed |
Blunt or sharp |
|
Clay |
Medium (but reusable) |
Relatively available |
3 (for a 1-foot-square block) |
3 |
Reusable |
Recommended to use a tarp for mess, and clay must be reshaped with water between cuts |
High; you’ll need to clean clay from your hands, sword, the ground, etc. |
Blunt or sharp |
Note: You may need to scroll left and right to view the entire chart.
Water bottles
If you’ve ever practiced sword cutting, you’ve probably cut at least a few water bottles. Easy to find, relatively cheap, and straightforward to set up, they’re a simple and approachable way to get started in cutting. While water bottles can be good practice, there are downsides. They’re not environmentally friendly (you’re wasting water and using a material that may not be recycled), and they’re easy enough to cut that they do little to prepare you for more challenging targets. You also need to be able to accurately assess jagged edges in your cut and the spray from the bottle to improve your sword cutting technique. Simply separating the bottle into two pieces doesn’t necessarily mean it was a good cut.
Cost: Water bottles are one of the cheapest cutting mediums out there at approximately 10-20 cents per standard bottle.
Availability: They’re easy to find in any supermarket.
Speed needed: You’ll need a medium amount of speed to cut through standard water bottles (more than paper, less than tatami).
Difficulty: Water bottles are easy to cut. While thicker and tougher than paper, the rigidity of a water bottle means you can successfully cut through it even with poorer form.
Feedback: As stated above, ending up with two halves of a water bottle doesn’t mean that you cut well. Standard water bottles are small, so they’ll give you less feedback over the length of your cut than a wider cutting medium. Look for a straight, clean line with no jagged edges (usually indicating movement in your hands) or wavy changes in the line (indicating a change of direction in your cut). When you cut the bottle, the water shouldn’t spray outward, but ideally slosh straight down the sides of the sword cutting stand. Similarly, the pieces of the bottle shouldn’t fly away as though you hit the bottle with a baseball bat, but fall to the bottom of your stand. You’ll know you made a great cut if the base of the bottle remains in place on the stand—consider taking a celebratory sip when you achieve this! 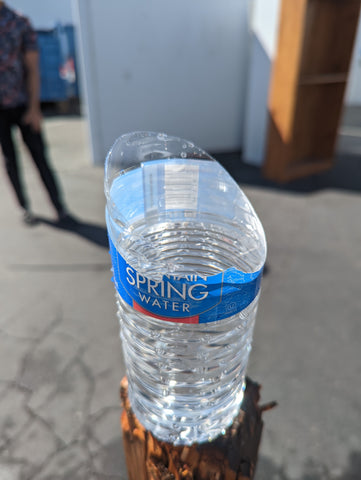
Reusable/recyclable: Water bottles are one of the more environmentally unfriendly items to cut. They not only waste water, you can’t reuse the plastic and it may not be recycled.
Prep: Almost no prep is necessary, making water bottles popular for cutting practice. All you need to do is buy a case of bottles and place one on the edge of a flat surface slightly below chest height, whether a dedicated sword cutting stand, the edge of a table or trash can, or a similar surface. (Use a base that you don’t mind potentially cutting with a sword, but that won’t damage the sword if you hit it.)
Mess: Water bottles create minimal mess. You only need to pick up the pieces of plastic and wipe your sword down with oil and a cloth to prevent rust.
Blade sharpness: A sharp blade (the sharper, the easier) is necessary to cut water bottles.
Tatami
Tatami mats have long been the mainstay of HEMA cutting competitions and a popular test of skill at cutting classes and events, but they’ve become much more costly and difficult to find in recent years. Tatami takes some prep work, too: You’ll need a dedicated cutting stand with sharpened spikes, and tatami mats that have been tightly rolled and soaked for at least 4-6 hours (or overnight if the tatami is used). New tatami is an excellent cutting medium, but only if you can find it—which is why we’ve made sure to include several tatami mat cutting alternatives in this list. 
Cost: Tatami is expensive—currently $20 per mat (one roll) on Amazon. (You’ll typically get 4 to 6 cuts on one roll, depending on your skill level.)
Availability: Tatami mats have become difficult to find, especially new. (While used tatami is a cheaper, attractive-sounding alternative, we recommend against using it for cutting because nails and dirt in the tatami can scratch or damage your sword.)
Speed needed: You’ll need to swing with speed to make it through tatami.
Difficulty: Tatami is the most difficult object on this list to cut. Don’t let your nerves get the best of you when standing in front of tatami, though. Relax and cut with good form and structure, as you would any other object, and you’ll have the best chance of making it through.
Feedback: You want a straight, clean line with no jagged edges or wavy changes in the line visible in the cut. When you're cutting tatami mats, the blade should go all the way through, with the cut piece(s) falling straight down the side of your stand. There should be no spray of grass out to the sides. Though a tatami mat is wider than a water bottle, it’s still fairly narrow, so will only give you direct feedback on the portion of your cut that intersected it. 
Reusable/recycleable: New tatami mats (without nails or other materials in it) can be composted in the green waste bin.
Prep: To cut tatami mats, you’ll need a dedicated sword cutting stand (also known as a tameshigiri cutting stand) and sharpened wooden spikes that slot into the stand. You’ll also need to prepare the tatami mats in advance by tightly rolling each one and securing it with rubber bands, then soaking it in water from 4 hours to overnight before cutting.
Mess: You’ll need to pick up the tatami pieces and clean and oil your sword, which will be streaked from the tatami and water.
Blade sharpness: A sharp blade (the sharper, the easier) is needed for cutting tatami mats.
Paper
New to the cutting scene, paper has a lot of potential. You’ll need to find a thick, heavy duty roll and suspend it above your head either with a custom stand or a rope tied to a beam or branch. While paper sounds easy to cut, its flimsiness means you need good form for the cut to go through without ripping the paper or batting it to the side.
On the downside, you don’t need much speed as long as you use proper form, meaning that cuts that work on paper may fail on materials like tatami. Looking for more of a challenge? Increase the difficulty level by using a blunt instead of a sharp sword. SoCal Swordfight 2022 (run by SoCal Swords) used paper for the first time in the beginning, open, and advanced cutting tournaments, with overwhelmingly positive feedback from competitors.

Cost: Paper is relatively cheap (we sell it for $42 per roll), and you can get hundreds of cuts from a roll.
Availability: Paper is only somewhat available for sword cutting because you need the right type. It’s important to use thick, heavy duty, wide paper to make it an effective cutting medium.
Speed needed: You can successfully cut through paper with very little speed as long as you’re using proper form.
Difficulty: Paper is relatively easy to cut through. Though paper is thin and lightweight, its flimsiness means it can easily wrap around your sword, be pushed to the side, or start to rip instead of cut. Good form is essential to making a clean cut through paper.

Feedback: Wide paper gives great feedback along the entire length of your cut. Look for a straight line with no rips, waves, or jagged edges. The cut piece should fully separate from the roll. The piece hanging from the roll above the cut line should show minimal movement after your cut, without significant waving back and forth (this also sets you up for more complicated techniques, like double cuts). It also typically makes a very loud noise when it’s ripped or cut poorly. 
Reusable/recyclable: Paper can be recycled. At SoCal Swords, we also reuse it as packing material. Know that any packing paper in your order was cut with a sword!
Prep: You’ll need either a cutting stand or a place from which to suspend the roll of paper horizontally, with a rope through the center of the roll. A tree branch, ceiling beam, or anything similar (as long as there’s ample space around it so you don’t hit anything with the sword) should work. You also need to ensure there is very little to no wind or breeze. Weights can be hung from the bottom of the loose end to help stabilize it.
Mess: Paper is the cleanest object to cut. You’ll need to pick up the paper pieces, but there’s no need to clean your sword.
Blade sharpness: You can use a sharp blade to cut paper, or try a blunt for a greater challenge or if you don’t own a sharp. 
Clay
There are huge upsides, and equal downsides, to cutting clay. The positives: It’s endlessly reusable, as long as you keep it wet while storing it; it provides good feedback; you can cut it with a blunt sword; and you can easily change the size and shape of the piece you’re cutting for different challenge levels. The negatives: You have to reshape it by hand after every one to several cuts, and it’s very messy. 
Cost: $10 to $30 per 10 pounds of clay, so somewhat expensive for our recommended minimum of 50 pounds (or 150 to 200 pounds for advanced cutters). However, it’s endlessly reusable if you store it properly (keep it wet).
Availability: Easy to find online or at a local pottery or arts and crafts store. We recommend modeling clay.
Speed needed: This varies based on the size and shape of your clay. For a 12 by 12-inch block, the approximate size we recommend to begin with, you’ll need a medium amount of speed to get through successfully (more than water bottles, less than tatami). This is because clay offers more resistance through your swing compared to other materials. Also be aware that the more clay is above your cut, the harder the cut will be due to the increased weight pushing down on your blade.
Difficulty: The difficulty of cutting clay again varies, but a 12 by 12-inch block will be of medium difficulty to cut through. The best thing about clay is the ease with which you can scale up the difficulty in force application while increasing your ability to check edge alignment over a longer distance (you increase both of these by adding more clay).
Feedback: Clay lets you easily see the entire line of your sword’s motion through the medium. As with other sword cutting materials, you want a flat line clear of waves and jagged edges. Your sword should go straight through without getting stuck in the clay. The cut piece should fall straight down or, ideally, stay in place, which is easier to achieve with the heavy, sticky clay than with other mediums. 
Reusable/recyclable: You can reshape clay after every few cuts, meaning you can cut the same piece all day. As long as it stays relatively clean and you keep it from drying out while in storage, you can continue to use it for months or even years.
Prep: Clay takes both initial and continued prep. We recommend laying down a tarp to help catch pieces of clay and droplets of dirty water. You can place your clay on the edge of a table, overturned trash can, or any other wide, weight-bearing surface of acceptable height that won’t sustain damage or hurt your sword if you hit it. After every few cuts, you’ll need to pick up the clay pieces and reform the clay, dipping your hands in water and rubbing along the cut faces to help stick them back together.
Mess: Clay is very messy. If you’re cutting and handling clay on your own, prepare for it to get on your clothes, hands, sword blade, handle, the ground, walls, ceiling, and any innocent bystanders. Wear clothes you don’t mind getting dirty and consider laying out a tarp to help catch clay pieces to keep them, and the ground, clean. (Safety tip: You may drip water onto the tarp while reforming your clay, so watch your step as it will get slippery. We recommend periodically wiping up any spilled water.) You’ll need to thoroughly clean your sword after cutting with clay and may find pieces of dried clay embedded in the cord wrap for months to come (one of the reasons we recommend using a cheaper blunt sword to cut clay instead of a sharp).
Blade sharpness: You can use either a sharp or a blunt sword to cut clay, but we recommend a blunt. Clay will quickly dull the edge of a sharp and will take a fair amount of cleaning to remove. The clay will also scratch and dull the finish of a polished blade. Use a blunt on which you don’t mind finding dried clay in hidden crevices later on.